The Best 20-Minute Dessert Hack: Easy Upside-Down Puff Pastry Tarts
We have all been there: you have last-minute dinner guests on the way, or you are hit with a sudden, intense craving for a sophisticated bakery-style treat, but you don’t have hours to spend measuring flour, chilling dough, and hovering over a hot oven. Enter the ultimate solution for effortless baking: the best 20-minute dessert hack. This genius baking method delivers a spectacular contrast of textures—shattering, buttery layers of golden-brown pastry meet a deeply caramelized, sweet fruit topping that looks like it came straight out of an upscale Parisian patisserie. It proves that you do not need expensive specialized equipment or years of professional pastry training to achieve dessert perfection right in your own kitchen.
The secret behind why this technique functions as the best 20-minute dessert hack relies on clever food science and a flipped baking method. By layering your sweeteners and fresh fruit directly onto parchment paper before placing the pastry on top, you trap the natural juices and sugars against the high heat of the baking sheet. This causes the sugars to rapidly reduce and caramelize without burning the delicate dough, while simultaneously keeping the bottom of your pastry perfectly safe from becoming soggy or tragically mediocre. Once you learn this simple, game-changing method, you will never look at making homemade tarts the old way again. Get ready to elevate your weekend brunches, holiday spreads, and casual weeknight dinners with the most budget-friendly, show-stopping dessert imaginable.
Why You’ll Love This Recipe
- Incredibly Budget-Friendly: You only need a single sheet of store-bought puff pastry, a drizzle of honey, and some seasonal fresh fruit, keeping your total grocery cost exceptionally low.
- Better-Than-Restaurant Texture: The upside-down baking technique maximizes the crispiness of the puff pastry layers, creating a sturdy, flaky base that handles the juicy fruit beautifully.
- Set It and Forget It Quick Prep: Once your fruit is sliced, the assembly takes less than five minutes, and the oven does all the heavy lifting in a flash.
- Infinitely Customizable: While we love a classic honey and apple combination, this technique serves as a blank canvas for any of your favorite fruits, berries, or sweet spreads.
Ingredients You’ll Need
- Puff Pastry: 1 sheet of store-bought puff pastry, thawed to room temperature
- Fresh Fruit: 1 large honeycrisp apple or pear, thinly sliced (or 1 cup of fresh berries)
- Honey or Maple Syrup: 4 tablespoons (for the caramelized base)
- Egg Wash: 1 large egg beaten with a splash of water (for that golden-brown shine)
- Powdered Sugar: For dusting right before serving
- Cinnamon or Nutmeg: A pinch to enhance the warm flavor profile
Ingredient Notes & Substitutions
Choosing the right components makes a massive difference in your final dessert. The pastry is the absolute foundation here; a high-quality, all-butter frozen puff pastry is preferred because it yields uniform, flaky layers that puff up with a beautiful, light edge. Ensure your pastry is completely thawed but still cold to the touch; if the dough gets too warm before entering the oven, the fat content will melt prematurely, ruining your chances of getting that sky-high rise.
For the fruit, opt for medium, uniformly shaped varieties. Firm apples, pears, peaches, or whole fresh berries work best because they hold their structural integrity under intense heat. Avoid overly soft or watery fruits, as they will release too much moisture and turn your caramelized topping into a runny pool. When it comes to the sweetener, high-quality honey or pure maple syrup works beautifully to create that signature sticky, glassy caramel crust that mimics high-end bistro desserts perfectly.
Step-by-Step Instructions
Step 1: Preheat and Prep the Pastry
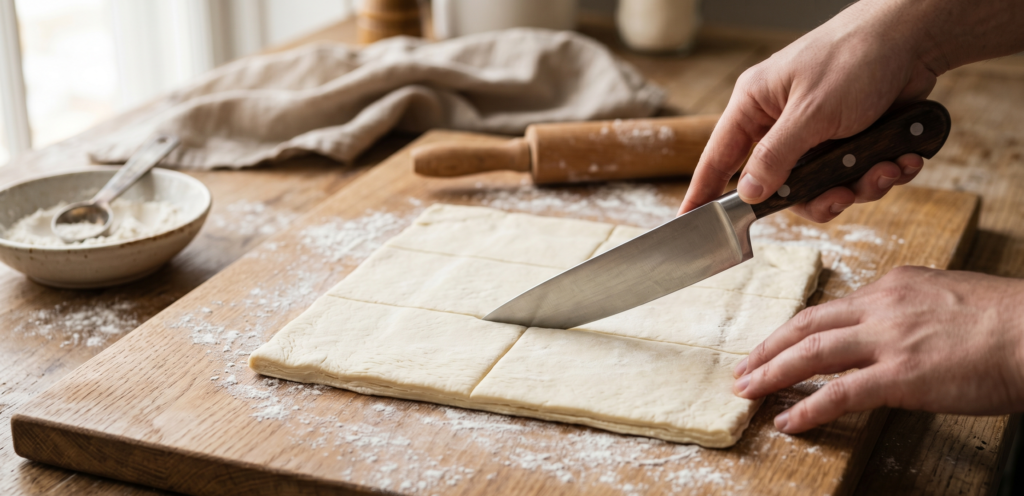
Preheat your oven to 400°F (200°C). Line a large, rimmed baking sheet with a piece of high-quality parchment paper. Unroll your thawed puff pastry sheet onto a lightly floured surface and use a sharp knife to cut it into 6 equal rectangular pieces.
Step 2: Drizzle the Sweetener Base
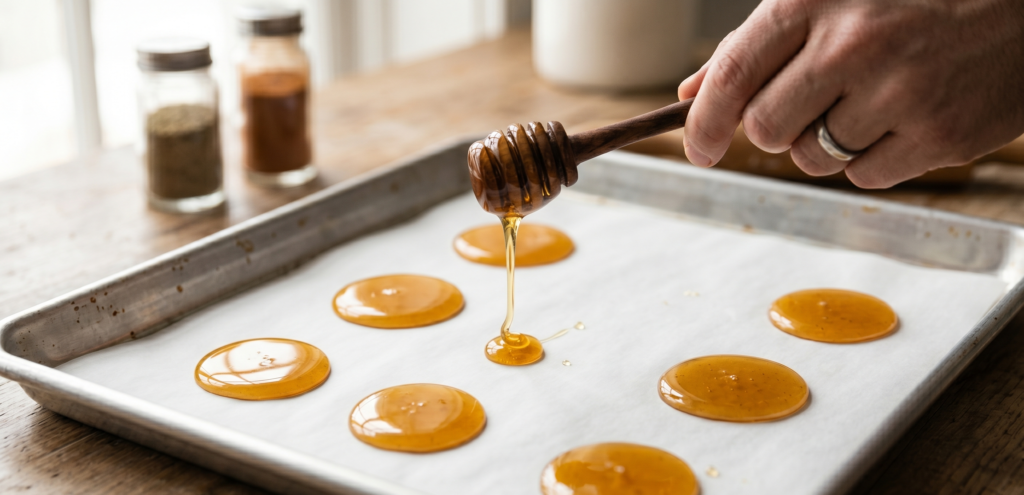
On your lined baking sheet, space out 6 separate puddles of honey or maple syrup, using about two teaspoons for each spot. Ensure they are spaced at least two inches apart so the tarts do not bleed into one another during the baking process. Dust each sweet puddle with a tiny pinch of ground cinnamon.
Step 3: Layer the Fresh Fruit
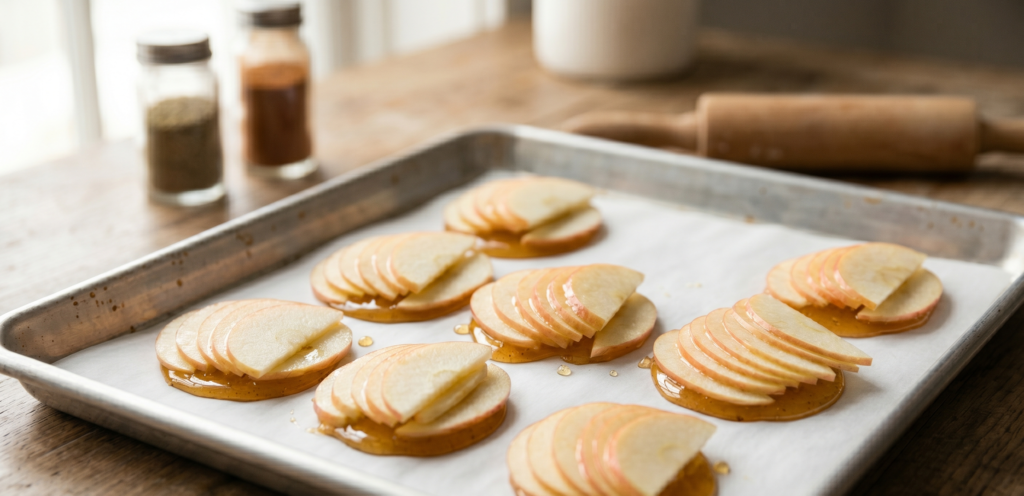
Arrange 3 to 4 thin slices of your chosen fruit (like apples or pears) directly on top of each puddle of honey. Overlap the fruit slices slightly so they form a beautiful, compact shingle pattern that fits perfectly within the dimensions of your pastry rectangles.
Step 4: Cover with Pastry and Egg Wash
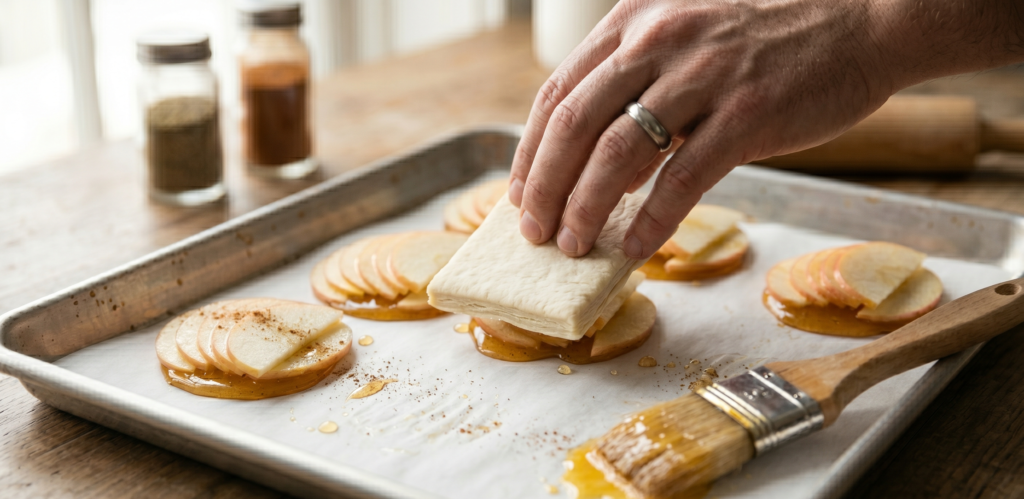
Place one rectangle of puff pastry directly over each fruit arrangement. Use your fingers or the tines of a fork to gently press and seal the edges of the pastry down against the parchment paper, trapping the fruit underneath. Lightly brush the tops of the pastry with your prepared egg wash.
Step 5: Bake to Golden Perfection and Flip
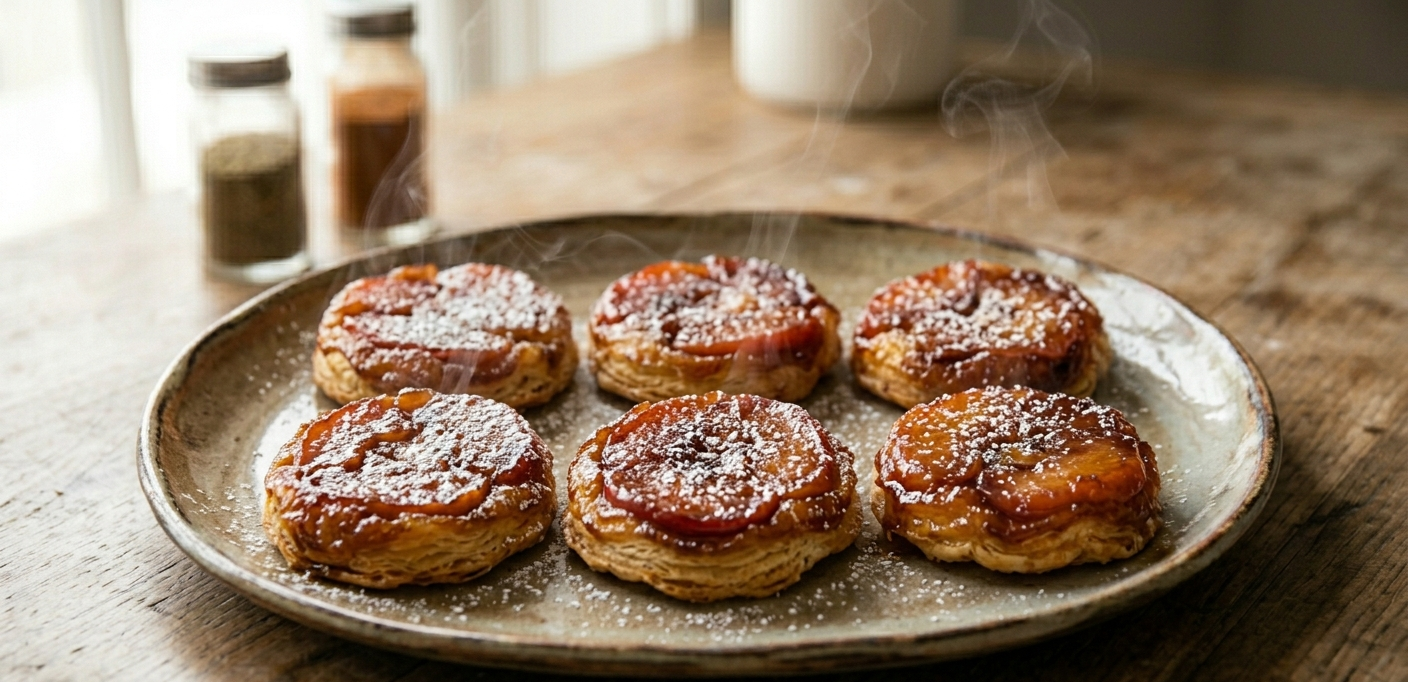
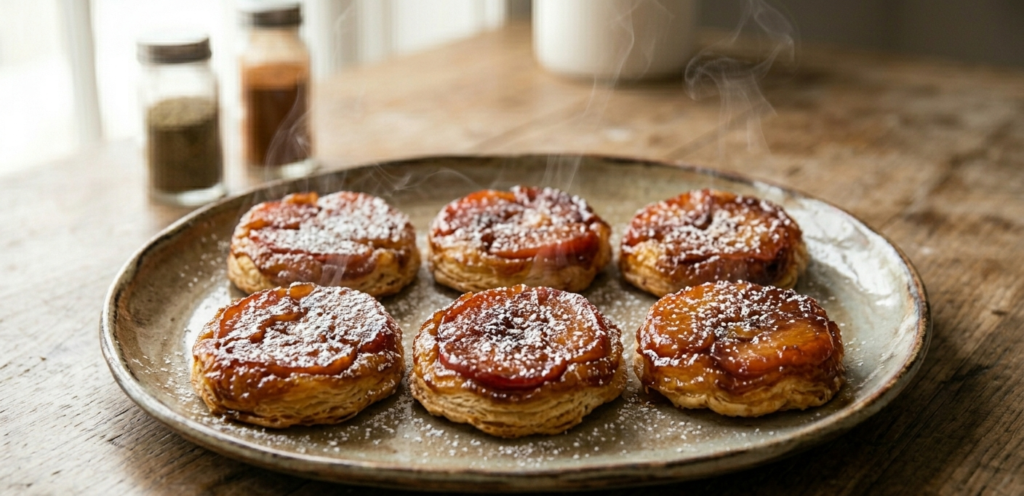
Pop the tray into the preheated oven and bake for 12 to 15 minutes, until the pastry looks beautifully puffed, deeply golden-brown, and crisp to the touch. Remove from the oven and let them cool for exactly two minutes. Using a spatula, carefully flip each tart upside-down onto a serving platter to reveal the glossy, caramelized fruit topping. Dust with powdered sugar and serve hot.
Tips for Perfect Results
- Don’t Skip the Parchment Paper: The honey will stick permanently to a bare metal pan, ruining your dessert. High-quality parchment paper ensures a completely effortless, non-stick flip every single time.
- Work with Cold Pastry: Keep your puff pastry rectangles in the refrigerator until the exact moment you are ready to place them over the fruit. Cold dough creates the ultimate flaky layers.
- Don’t Over-Saturate: While it is tempting to use a massive amount of honey or juicy fruit, stick to the recipe measurements. Excess liquid will steam-roll your crust, making it soft instead of shattering and crisp.
Recipe Variations
- The Savory-Sweet Brie Twist: Place a thin slice of brie cheese directly over the honey before adding your apple slices, then top with pastry for a sophisticated, rich flavor profile.
- Berry Chocolate Fusion: Substitute the fruit slices for fresh raspberries and place a few white chocolate chips into the honey puddle before covering with the dough.
- The Hot Honey Nut Masterpiece: Use hot honey instead of standard honey, and scatter finely chopped toasted walnut pieces into the base before baking for an incredible sweet-and-savory dessert crunch.
What to Serve With It
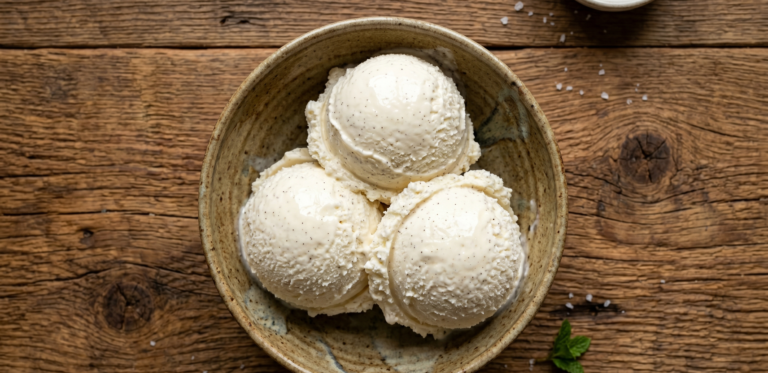
These versatile bite-sized pastries pair beautifully with a wide array of after-dinner treats or brunch sides. They function as the absolute perfect companion to a hot cup of traditional espresso, a steaming mug of chai tea, or a scoop of premium vanilla bean ice cream melting right over the hot caramel crust. If you are hosting a holiday gathering, serving them alongside a fresh fruit platter or a crisp sparkling dessert wine will instantly steal the spotlight.
Storage & Reheating Tips
If you miraculously have leftovers, it is highly recommended to store them properly to preserve that incredible crunch. Place the cooled tarts in a single layer inside an airtight container and store them at room temperature for up to 24 hours, or in the refrigerator for up to 3 days. When reheating to save a softened base, avoid the microwave at all costs—it will turn the pastry unpleasantly chewy and gummy. Instead, drop them into an air fryer at 350°F for 2 to 3 minutes, or spread them onto a baking sheet and pop them into a 380°F oven for 4 to 5 minutes until the sugar bubbles and the pastry is fully re-crisped.
Common Mistakes to Avoid
- Flipping Too Late: If you let the tarts cool completely on the baking sheet, the caramelized honey will harden and cement itself to the paper. Always flip them within 2 to 3 minutes of pulling them from the oven.
- Slicing the Fruit Too Thick: Cutting your apples or pears too thick means they won’t cook through or caramelize properly in the short 15-minute window, leaving you with a hard, awkward bite.
- Using Excess Liquid Sweeteners: Substituting thick honey or pure maple syrup with watered-down syrups introduces excess liquid that will bleed into the dough, turning your pastry soft within minutes.
Frequently Asked Questions (FAQs)
Can I use store-bought pie crust instead of puff pastry?
Yes, you can substitute puff pastry with standard pie dough cut into matching shapes. However, keep in mind that pie crust will yield a dense, flaky texture rather than the light, airy, and shattered layers that make this specific best 20-minute dessert hack so magical.
Will the fruit get soggy if I make these ahead of time?
Because the fruit is baked face-down against the caramel, the pastry stays remarkably crisp for up to 2 to 3 hours at room temperature. For the absolute best restaurant-quality results, though, it is highly recommended to bake and flip them right before your guests intend to eat them.
Why didn’t my pastry puff up into high layers?
This usually happens if your oven wasn’t preheated all the way to 400°F, or if your puff pastry dough sat out on the counter for too long and became warm. Puff pastry relies on cold fat hitting intense, direct heat to create steam and lift those signature layers.
Can I use frozen fruit for this recipe?
It is not recommended to use frozen fruit. Frozen varieties trap a massive amount of excess water inside their cells which releases rapidly as they thaw in the oven, causing your caramel base to turn watery and completely ruining your crisp pastry texture.
Final Thoughts
There is absolutely no need to spend a fortune at an artisanal bakery or hire a caterer just to enjoy impeccable, warm dessert pastries. With a single sheet of humble puff pastry, a basket of fresh seasonal fruit, and a simple drizzle of honey, you can easily replicate restaurant-quality culinary magic right in your own kitchen. This best 20-minute dessert hack is a stellar testament to how simple food science and smart kitchen preparation can completely transform everyday ingredients. Give it a try tonight, and watch your family and friends marvel at the flakiest, easiest dessert they have ever tasted!